

Menu Layout
Menu Layout
Menu layout is the page view that customers see first. Go to the “Select default layout” section in the Settings tab and choose your favorite layout from the three boxes. You can change the menu layout at any time. Click the Save button to update your settings. The menu layouts are shown in order in the image below.
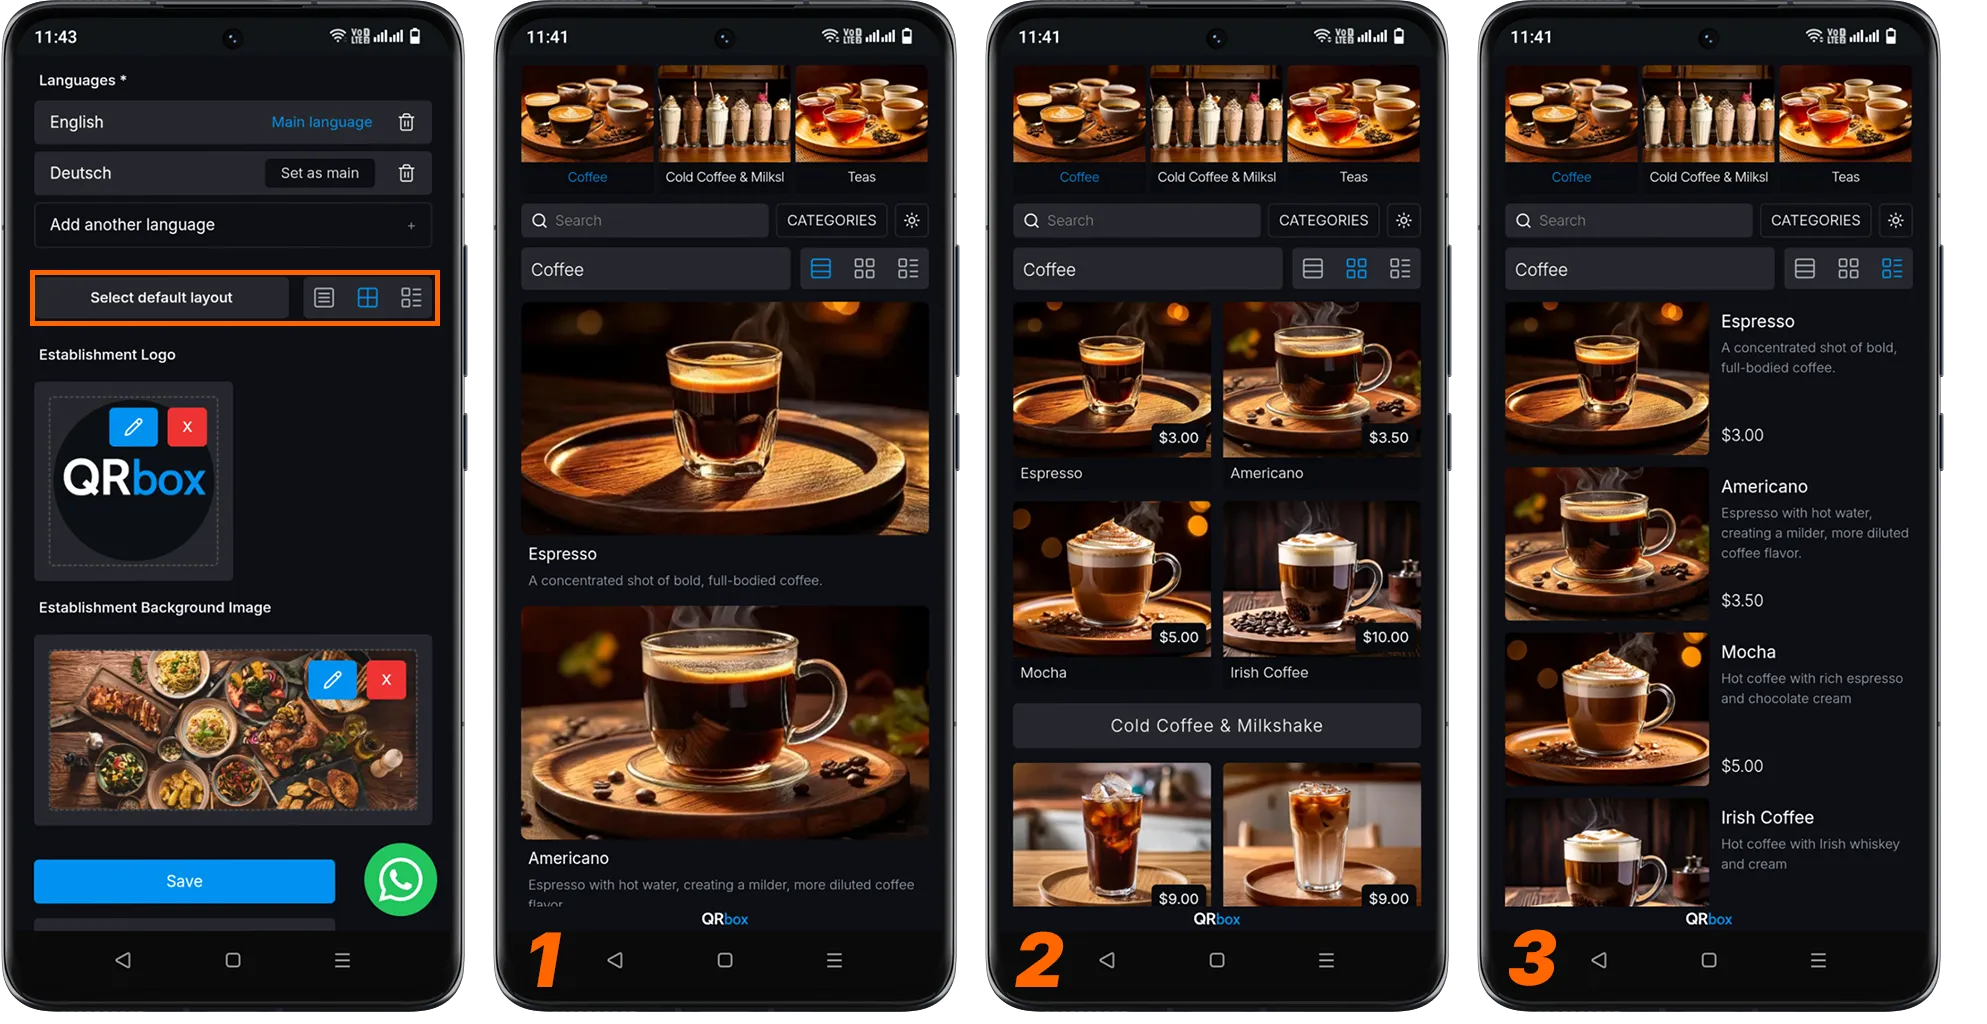
- Detailed view
- Grid view
- List view
Menu View Without Images
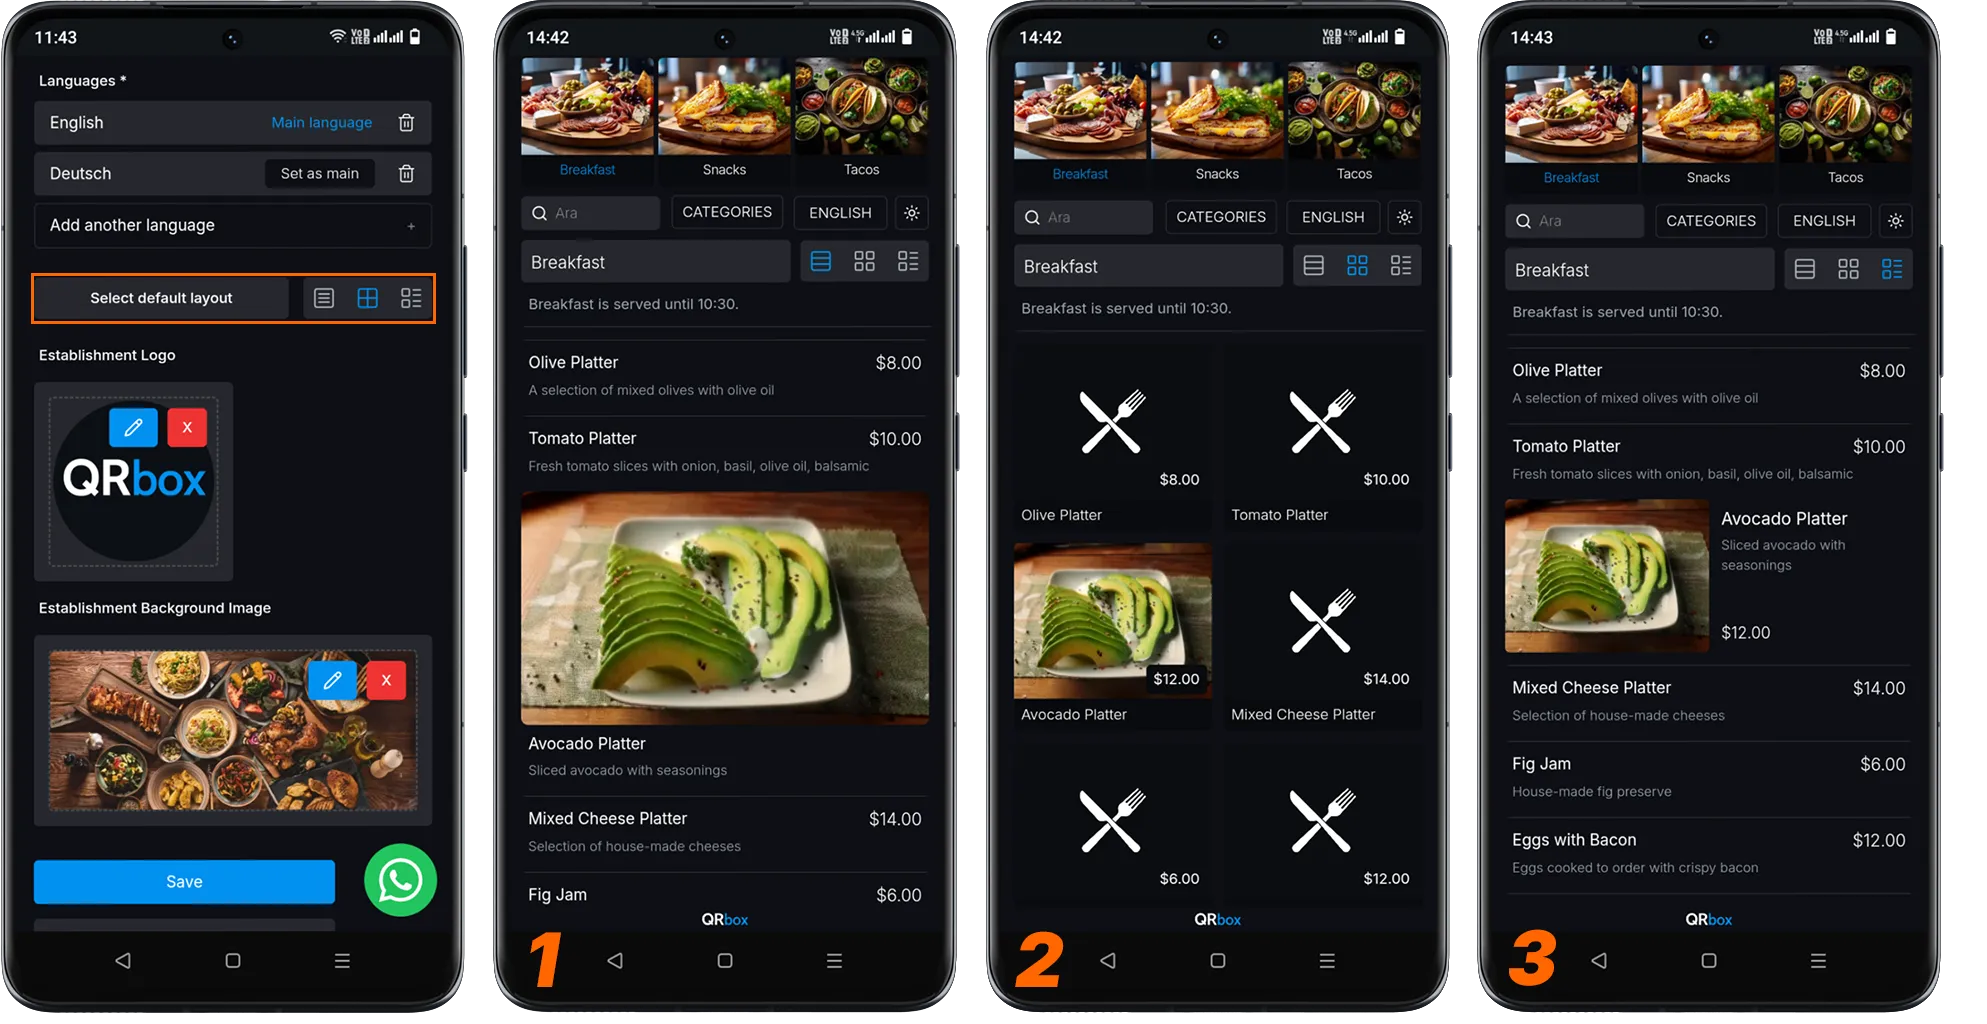
You can create a menu without using any images. This is similar to the paper menus we’re used to seeing on tables. If you prefer this option, the menu layouts will appear as shown below. When you select grid view, distinctive icons are used for areas where you haven’t uploaded images. These icons will appear as either food or drink icons depending on your category preference. (For example, all products added under the Drink category are represented by a glass icon.)

- Detailed view
- Grid view
- List view
Menu View with Both Image and Non-Image Products
When creating a menu, you might aim to highlight certain products. You might choose to add images for some products while preferring to use long description texts without images for others. Your menu will look elegant in both cases. For such menus, you can prefer the “List View,” which is the 3rd view option.
- Detailed view
- Grid view
- List view